
Setup Rules and Notifications
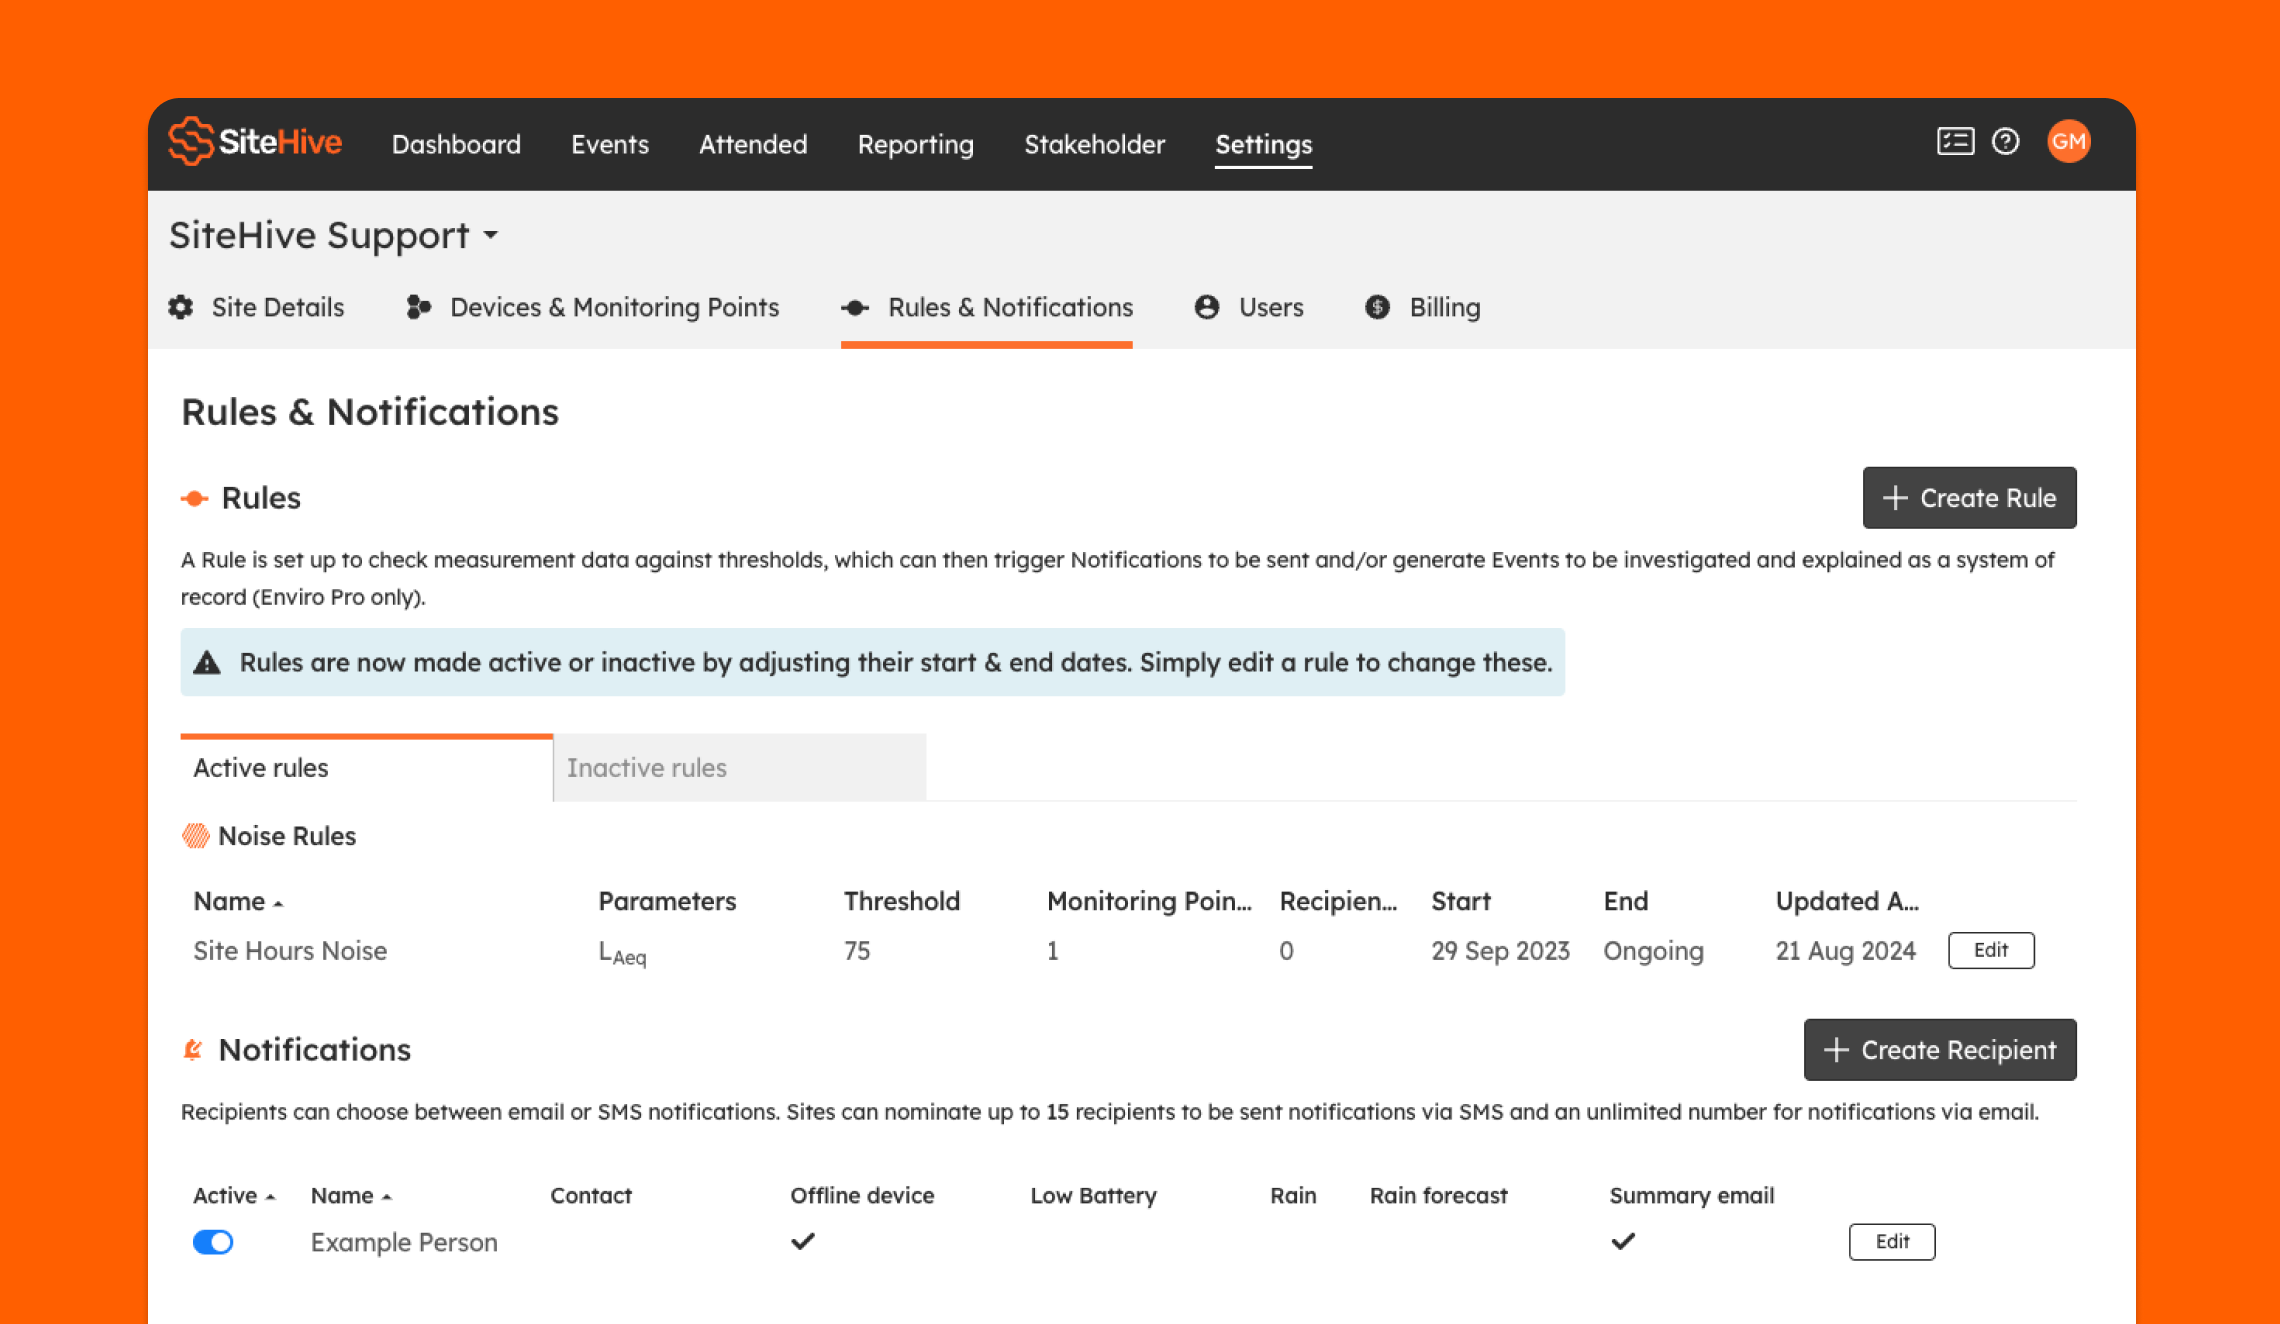
The best place to manage rules and notifications is on Settings / Rules & Notifications page.
Rules enable you to set thresholds for your data, that are visible on your graphs, and can send notifications to your phone. They are the best way to be aware if readings from your site are exceeding expected values.
Notifications can be trigger by rules, but you can also setup up notifications for to monitor whether devices have gone offline, device battery level, rainfall forecasts.
Create a Recipient for Notifications
Create a Rule
You can create a rule in a number of places in SiteHive Enviro Software but for best overview and control of Rules go to Settings / Rules & Notifications, and select the 'Create Rule' button. To create a rule follow these steps, in this example we will create a common noise rule that sets a threshold value of 75dB during site hours.
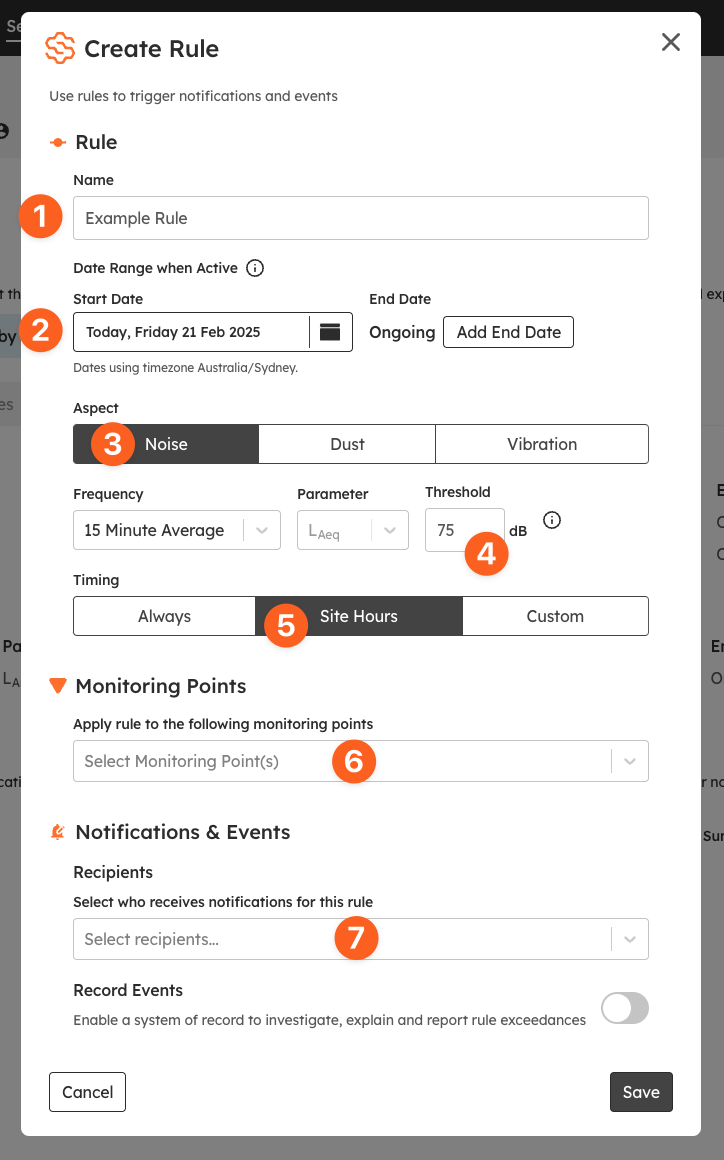
- Give your rule a name that helps communicate what it is measures, as this name appears when selected this rule & is also presented in the graph legend.
- Give the rule a date range when active, simply choose a start date - and leave end date as the default of 'ongoing'. This can be edited later if needed.
- Choose the aspect you are creating the rule for, in this case Noise
- Set frequency (how often it is checked), parameter and threshold. The threshold is what defines what is an exceedance.
- Then finally set whether this Rule applies to certain times of day - in this case Site Hours is selected
- Optional You can set what Monitoring Points the rule is applied to
- Optional You can set who receives notifications when the threshold of this rule is exceeded.
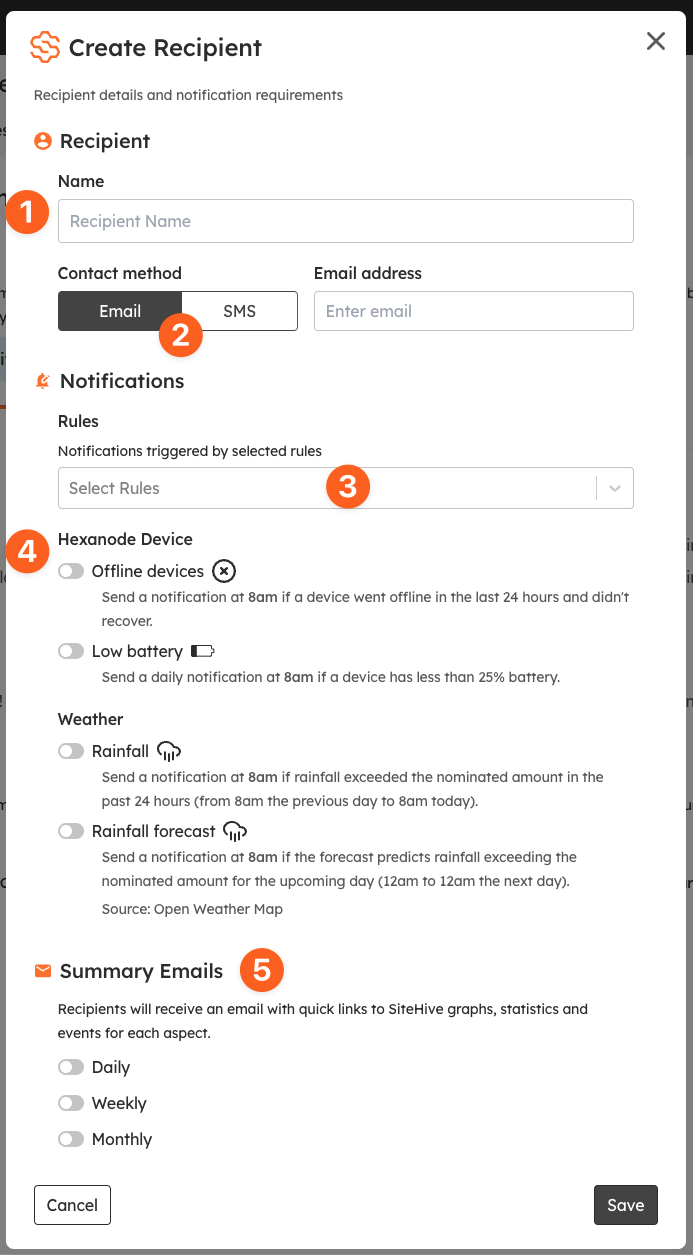
Create a Recipient for Notifications
To receive notifications a person needs to be setup as a Recipient. A recipient is different from a User - and is setup purely for receiving messages via email or SMS.
Let's create a recipient now goto the Settings / Rules & Notifications page:
- Name, simply use the persons first and last name
- Choose whether this person will receive Email or SMS notifications (if they need both, simply add them as recipients, one for email, one for SMS)
- If applicable - choose what Rules they will receive notifications for
- Choose whether they need to receive notifications based on device status or weather predictions
- Finally, whether the person wants to get email summaries (naturally this will only be an option get if the recipient is setup for Email)
SiteHive Enviro Pro Features
If you’re using SiteHive Enviro Pro, you can unlock even more functionality and create Events triggered by rules, which can be categorised and explained in a system of record. To find out more Managing Events with SiteHive Enviro Pro.
New to SiteHive Enviro Software?
Get familiar with key features by completing these four quick steps:
- Set Up a Device – Have a new device on-site? Add it to SiteHive Enviro Software using Easy Setup, then manage all your devices and monitoring points from the Dashboard.
- Create Notifications – Need alerts? Create a Rule and configure email or SMS notifications in Settings > Rules & Notifications.
- Explore & Report – View daily data on the Dashboard. For long-term trends, use the Reporting page to analyse graphs, stats, and generate PDF reports.
- Invite a User – Need to give team members access? Invite them as a new User on Settings/Users page.
- Access via a mobile device - want access to SiteHive Enviro anywhere/anytime? install the web app on your phone, it takes less than a minute to do.