SiteHive Support Center

Noise: How to setup Svantek

πŸ”ŠπŸ“³ Svantek


Svantek devices are able to connect to SiteHive Enviro Pro software via the FTP export setting in Svannet. 

A valid Svannet license that enables 'projects' is required. 

There are slightly different configurations based on the model of the Svantek device being used. 


πŸ”Ž Quick Search


Measurement setup on the device 


The measurement on the device is setup to enable data transfer. To check this under the project go to 'configuration', then 'edit station configuration':

This shows the Svantek dashboard and directs you to go to the configuration tab on the left hand sid and then go to your Svantek station and click 'edit station configurtion.'

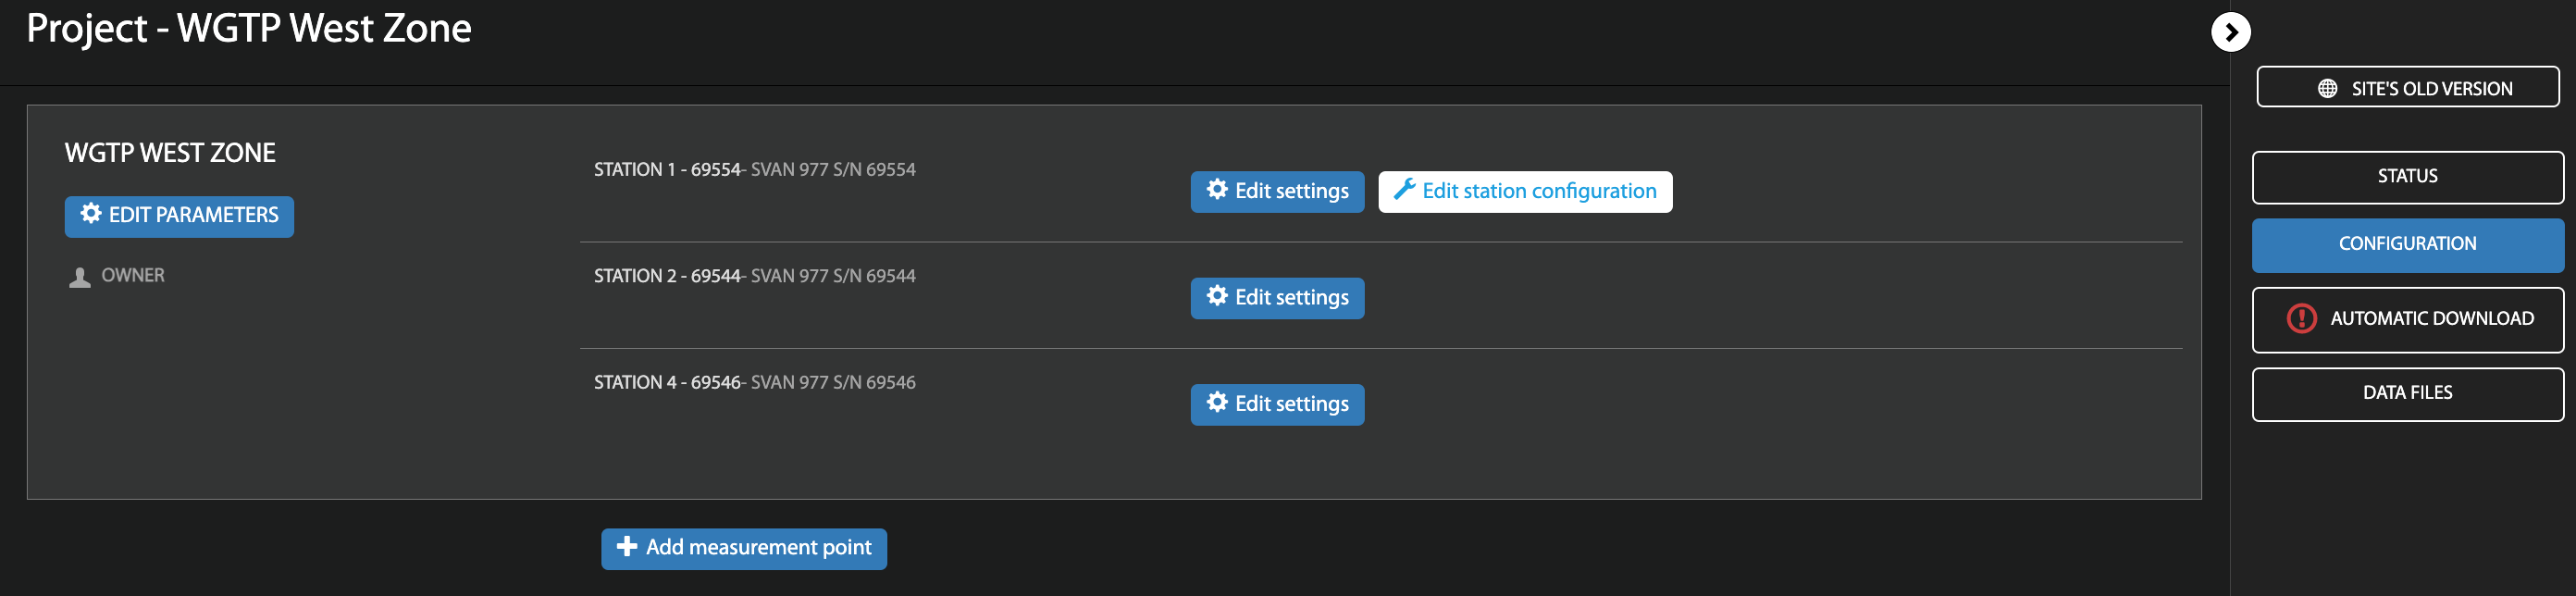
The settings here does vary per device/firmware, but most Svantek devices support automatic logger splitting.

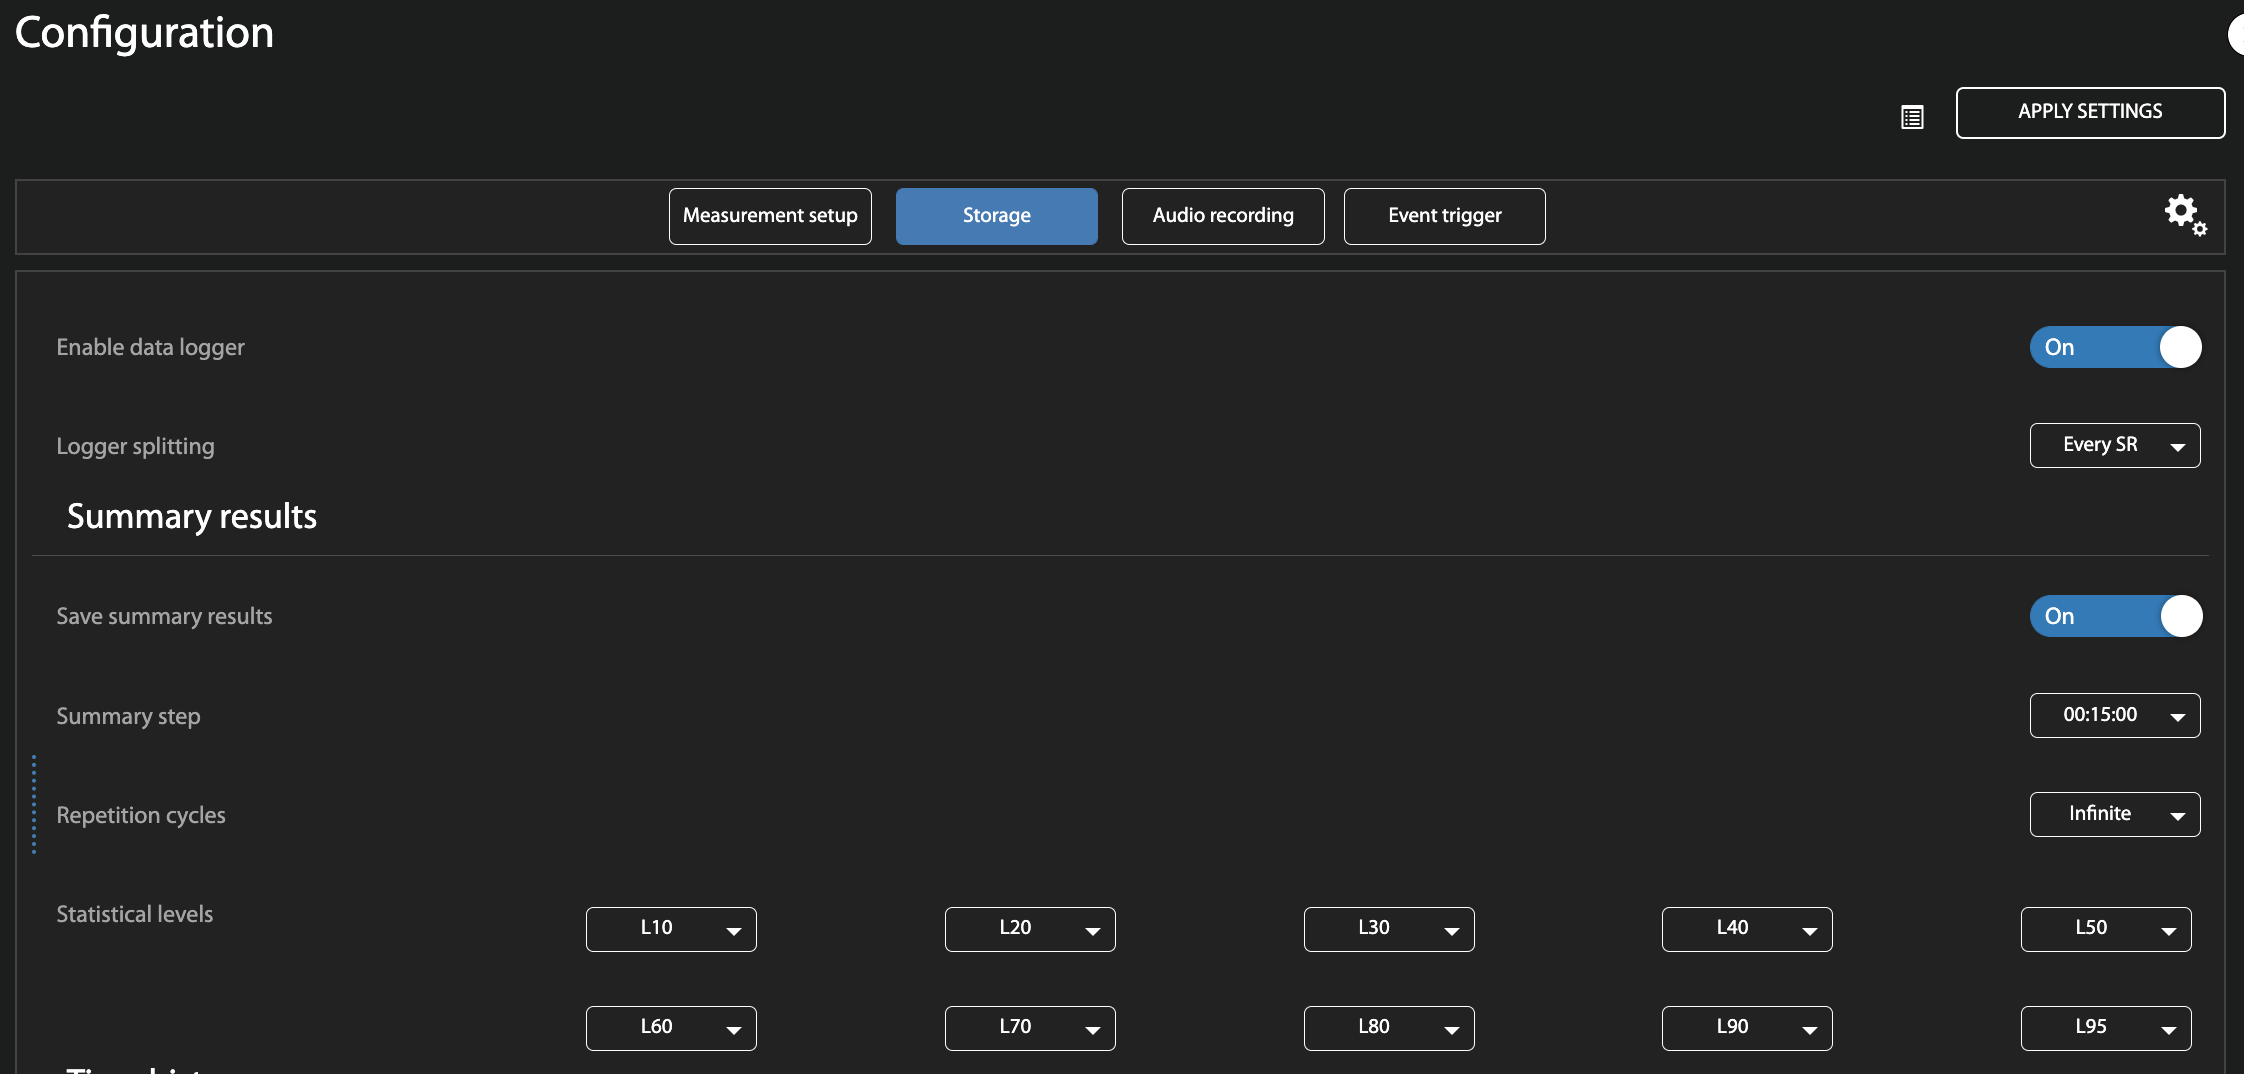
The example below is from a 977, the key setting settings here are setting a summary result to be saved ('Save summary results') every 15 mins, then above enabling 'Logger splitting' set to 'Every SR' - which means every summary result. Convoluted, but this will give us a results file every 15 mins. 

This image shows the page that you get directed to once you click 'edit station configuration' and go to the 'Storage' tab located on the top menubar of the configuration page. On the left hand side of the page there is 'enable data logger' which you will want to toggle on, on the left hand side. Then back to the left hand side there is 'logger splitting' which you can set on the left hand side and need to choose 'Every SR' from the drop down. On the left hand side under logger splitting there is a heading called 'Summary Results.' Underneath summary results there is 'Save Summary results.' On the right hand side toggle that to 'on.' Underneath save summary results there is summary step. There is a dropdown in the image on the right hand side and that has been selected as 15 minutes. Under summary step there is 'repetition cycles.' There is a dropdown to choose from on the left hand side of the page. 'Infinite has been selected.' Under repetition cycles on the left hand side there is 'Statistical levels.' In the image it shows that L10, L20, L30, L40, L50, L60, L70, L80,L90 AND L95 have been selected.


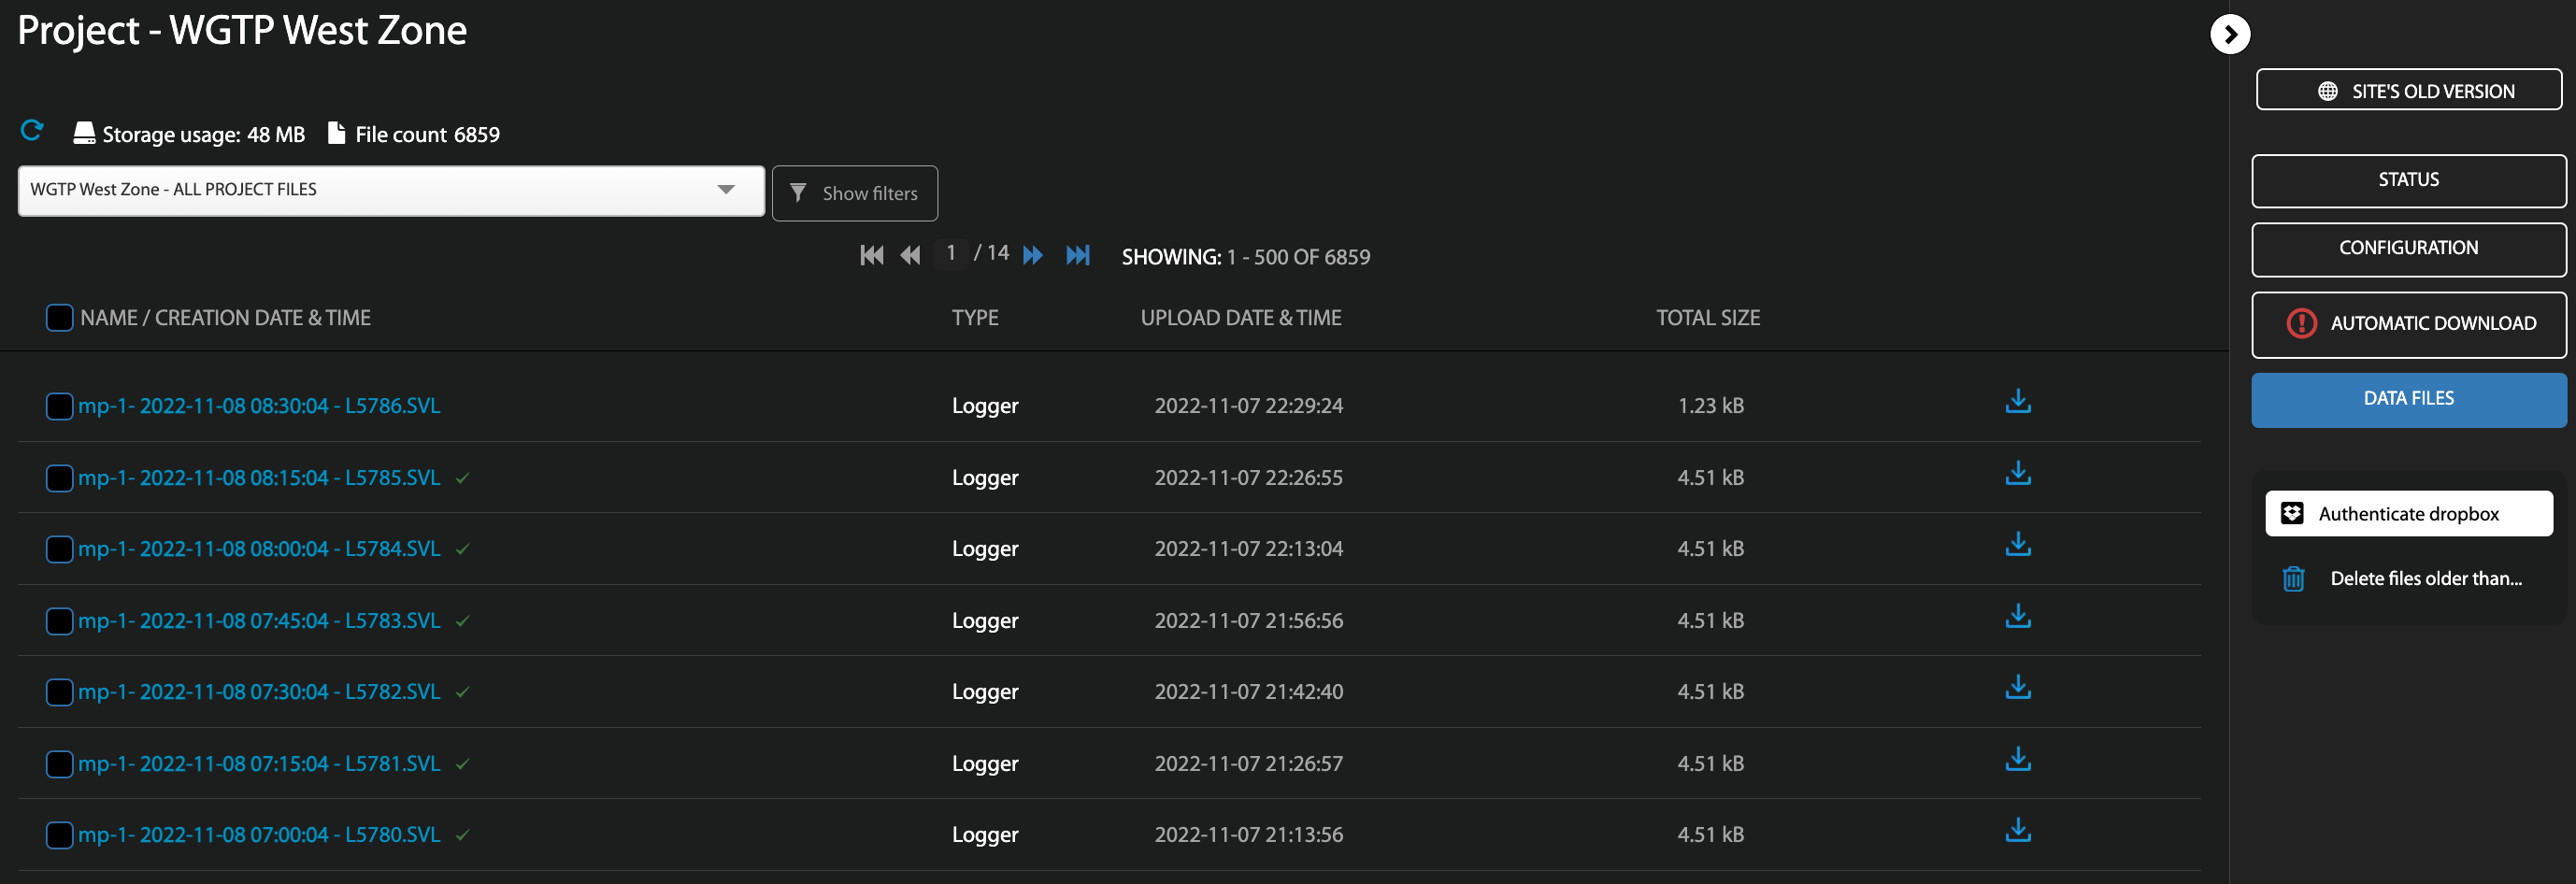
Once this is setup, we expect to see a file 'downloaded' to Svannet every 15 mins, this can be checked under the project, then 'data files': 


Svantek Svannet project page with configuration options for unattended noise monitoring device


Svannet configuration


Once logged in, the setup for connection to SiteHive is in 'Automatic Download', under each 'project': 

This image shows what the Svannet Configuration looks like when you've logged in. There is the project name on the top right hand corner and in the middle of the image there is a list of the Stations on that project. Next to each station name there is an alert icon, battery icon, connection icon and data icon. On the far right of the image there is a menubar that has Status, configuration, automatic download and data. In this image 'automatic download' has been highlighted to show where to click and automatically download data from your Svantek Station.

The automatic downloads page is where you configure both when/what is retrieved from the device (download period, file types), and also where these files are then sent (file upload destination). In the setup below, results & logger files will be retrieved 'continuously', so every 15 mins when ready (based on the setup above). 

This image shows the automatic download page. It has the project name in the top left hand corner and then has the settings in the middle of the page which include: Automatic download toggle (on or off)- in the image it is toggled on, Download period which has a drop down. In the image 'continuous' has been selected. Under download period there is file types. There are four options - results, logger, wave, csv. The file types selected in the image is results and logger. Under file types is low priority wave download which you can toggle on or off. This is toggled off in the image. Under low priority wave download there is 'start date/ minimum file date' - Here you can select a date from the calendar which appears on the right hand side when it has been toggled on. Underneath is file upload destination which is - sftp://ingest.sitehive.co/uploads (results CSV, Logger CSV.) Underneath is automatic download alarms and an edit button next to it on the right hand side. Underneath that setting there is 'scheduled memory clearing' with an on or off toggle. In the image it is toggled off. Underneath is Timezone. There is a drop down menu for you to select your timezone. The final setting underneath is 'storage clearing' - This is where it deletes files from Svannet. In the image there is a drop down to disable or enable. It is disabled in the picture.

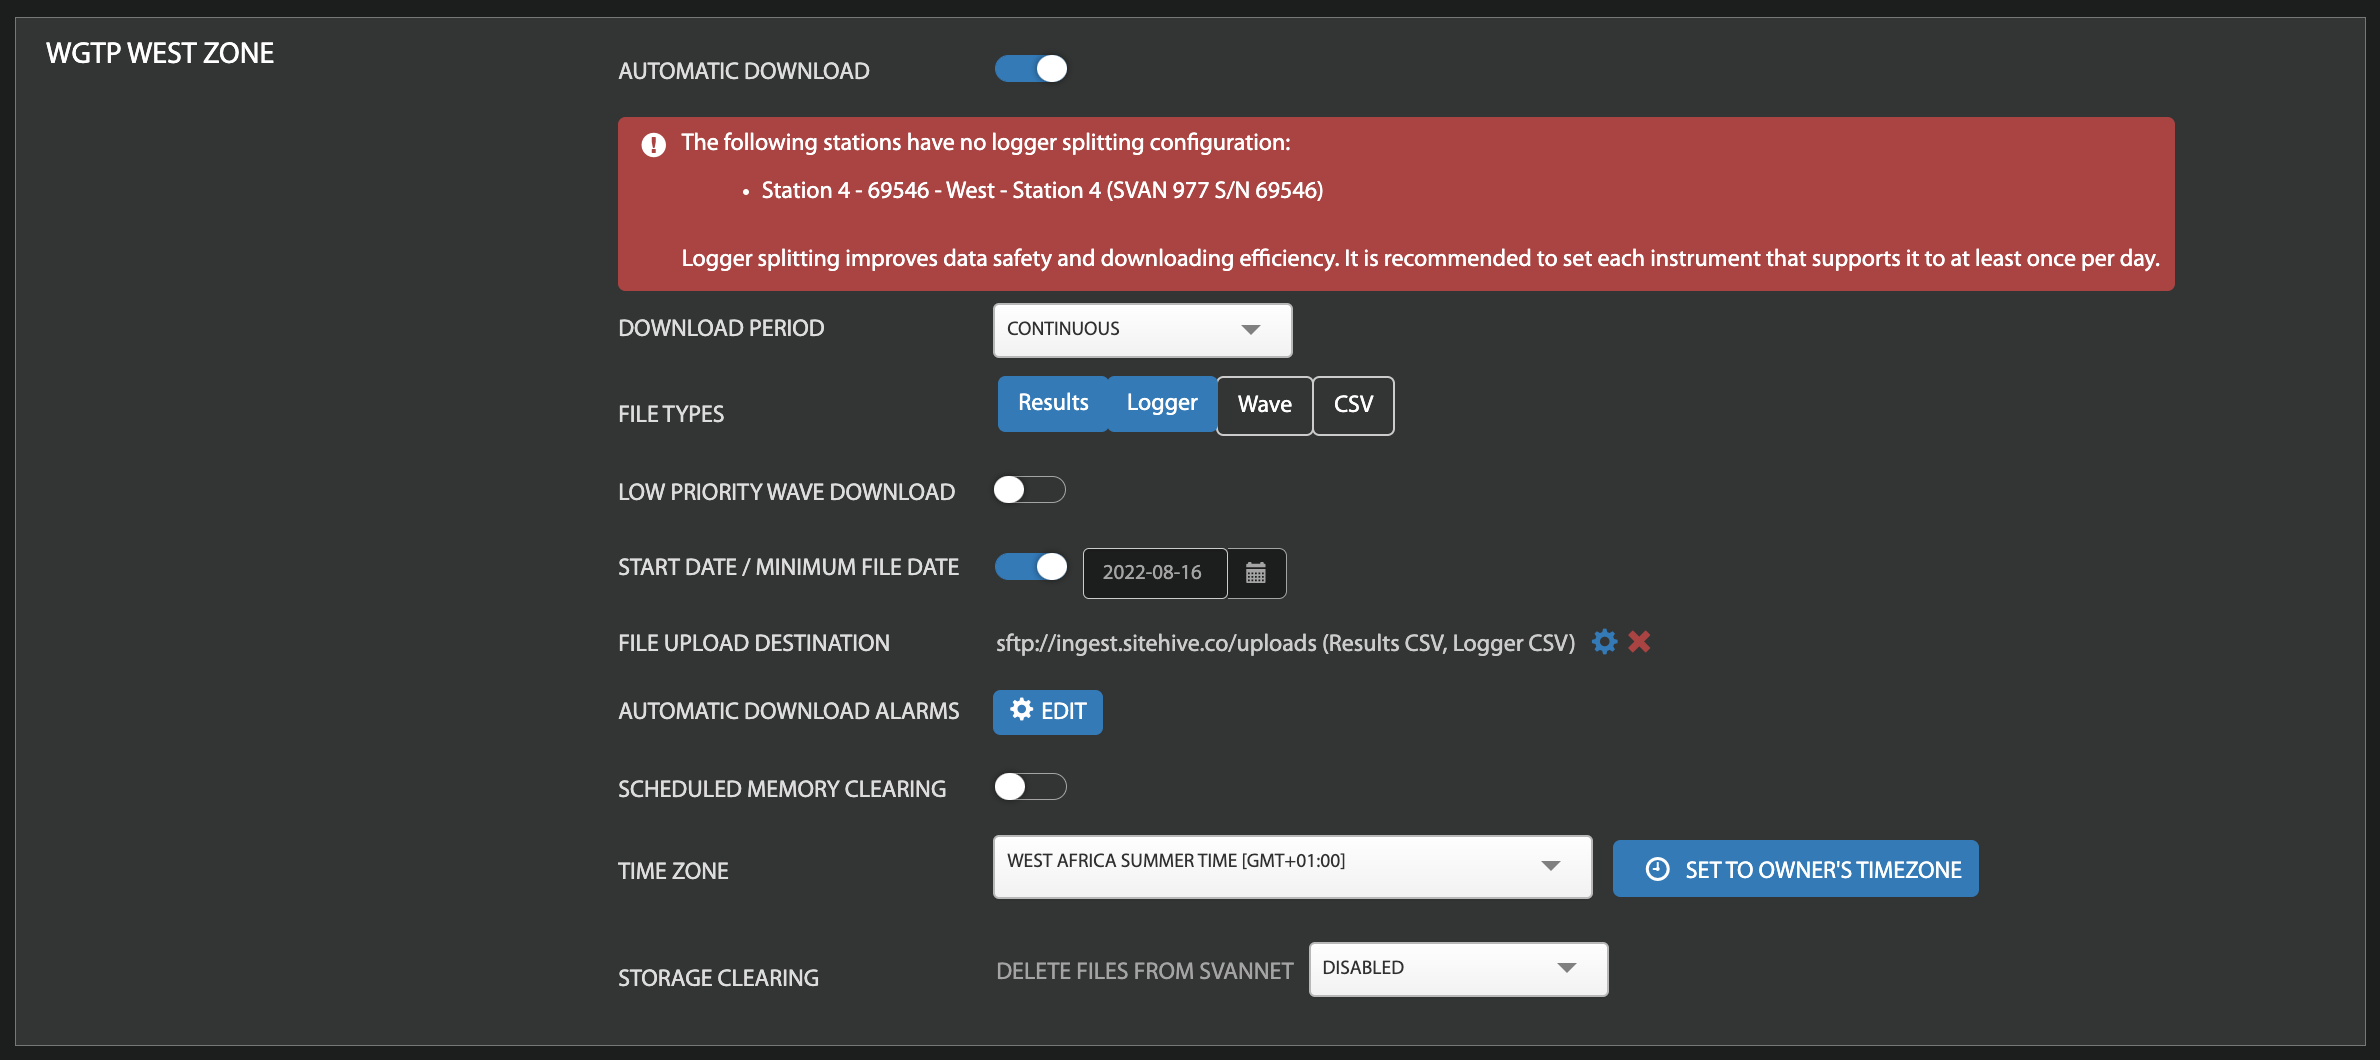
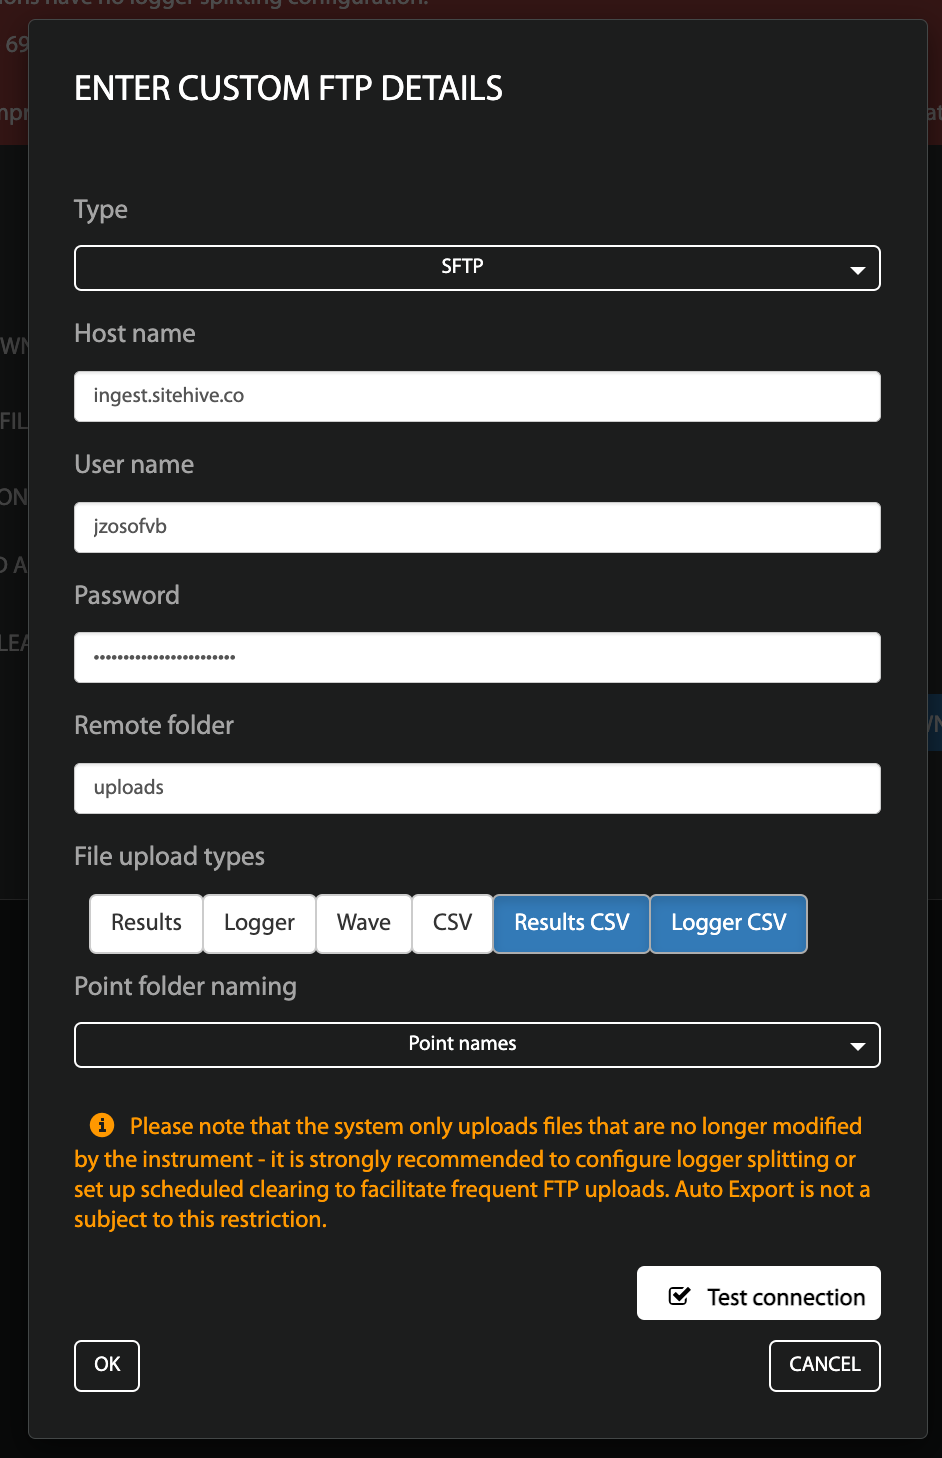
The setup for then sending the files to SiteHive is done in 'file upload destination', each project site has it's own username and password details (if you don't have these ask the SiteHive team). 

It's advised to press 'Test connection' to check that the credentials have been entered correctly. Note other settings as below:

This image shows the 'File upload destination' page - On this page you can see Type where SFTP has been selected from the dropdown. Underneath is 'Host name' which has 'ingest.sitehive.co' written as the Host Name. Underneath is username which has the user unique user name and underneath is password - which displays a hidden password in the image. Underneath password is 'Remote folder' where 'uploads' has been typed in the free text box. Underneath is 'File upload types' there are six options: Results, Logger, Wave, CSV, Results CSV and Logger CSV. Results CSV and Logger CSV have been selected. The final setting is 'Point folder naming' - from the drop down menu 'Point names' has been selected. There is an information note underneath that reads: 'Please note that the system only uploads files that are no longer modified by the instrument - it is strongly recommended to configure logger splitting or set up scheduled clearing to facilitate frequent FTP uploads. Auto Export is not a subject to this restriction.' At the bottom of the page there is an 'OK' button on the left and a 'cancel' button on the right.' Above the cancel button there is a 'Test connection' checkbox. In the image the checkbox has been ticked.